|
| Stage 1 - felt applied and long and short stitch started |
 |
| Stage 2 - Shading into the long and short stitch |
 |
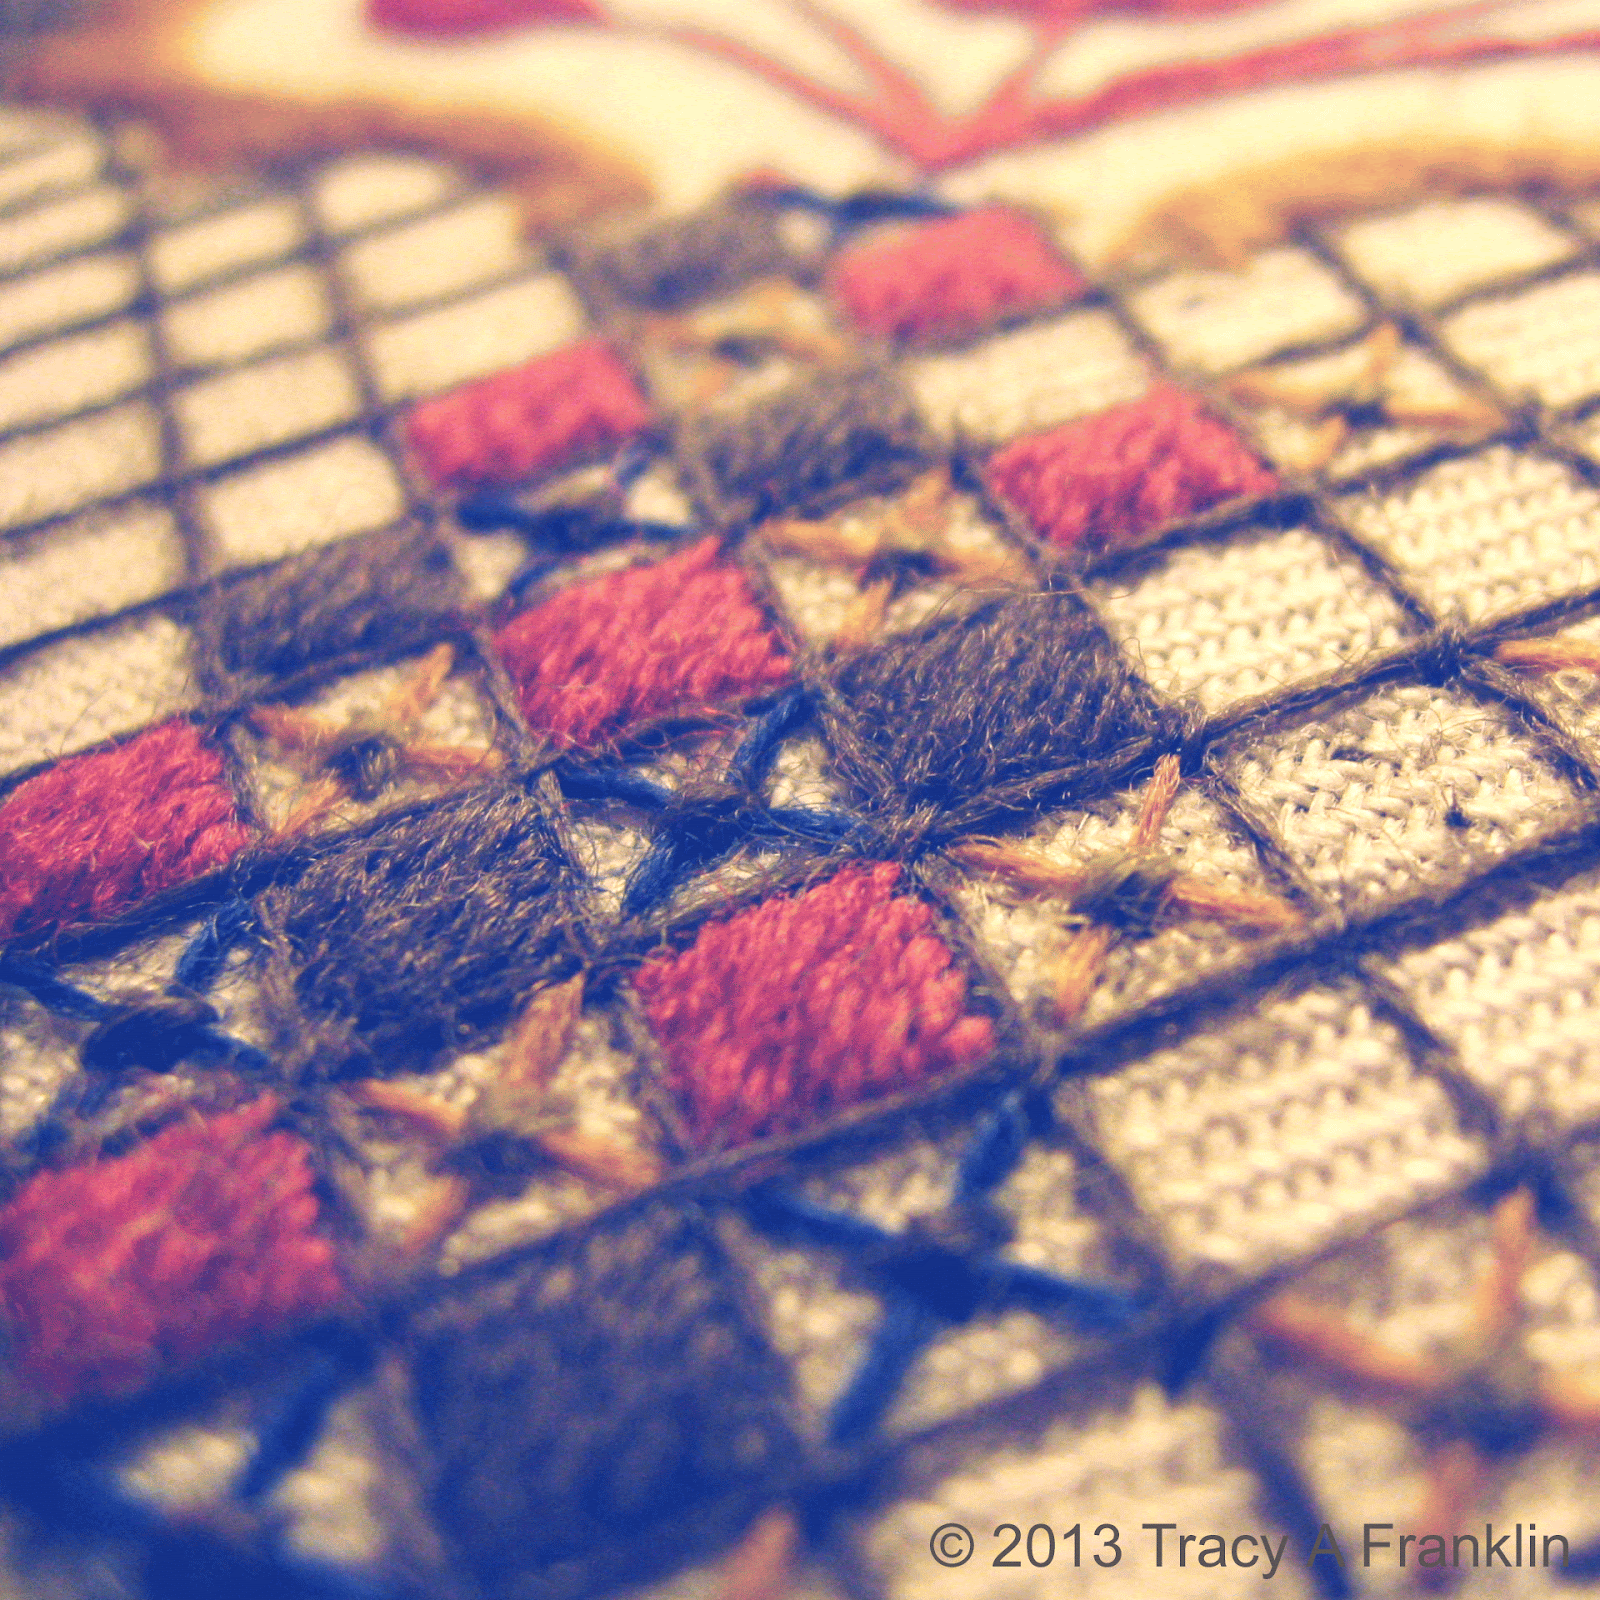
| Stage 3 - Detailed shot of shading |
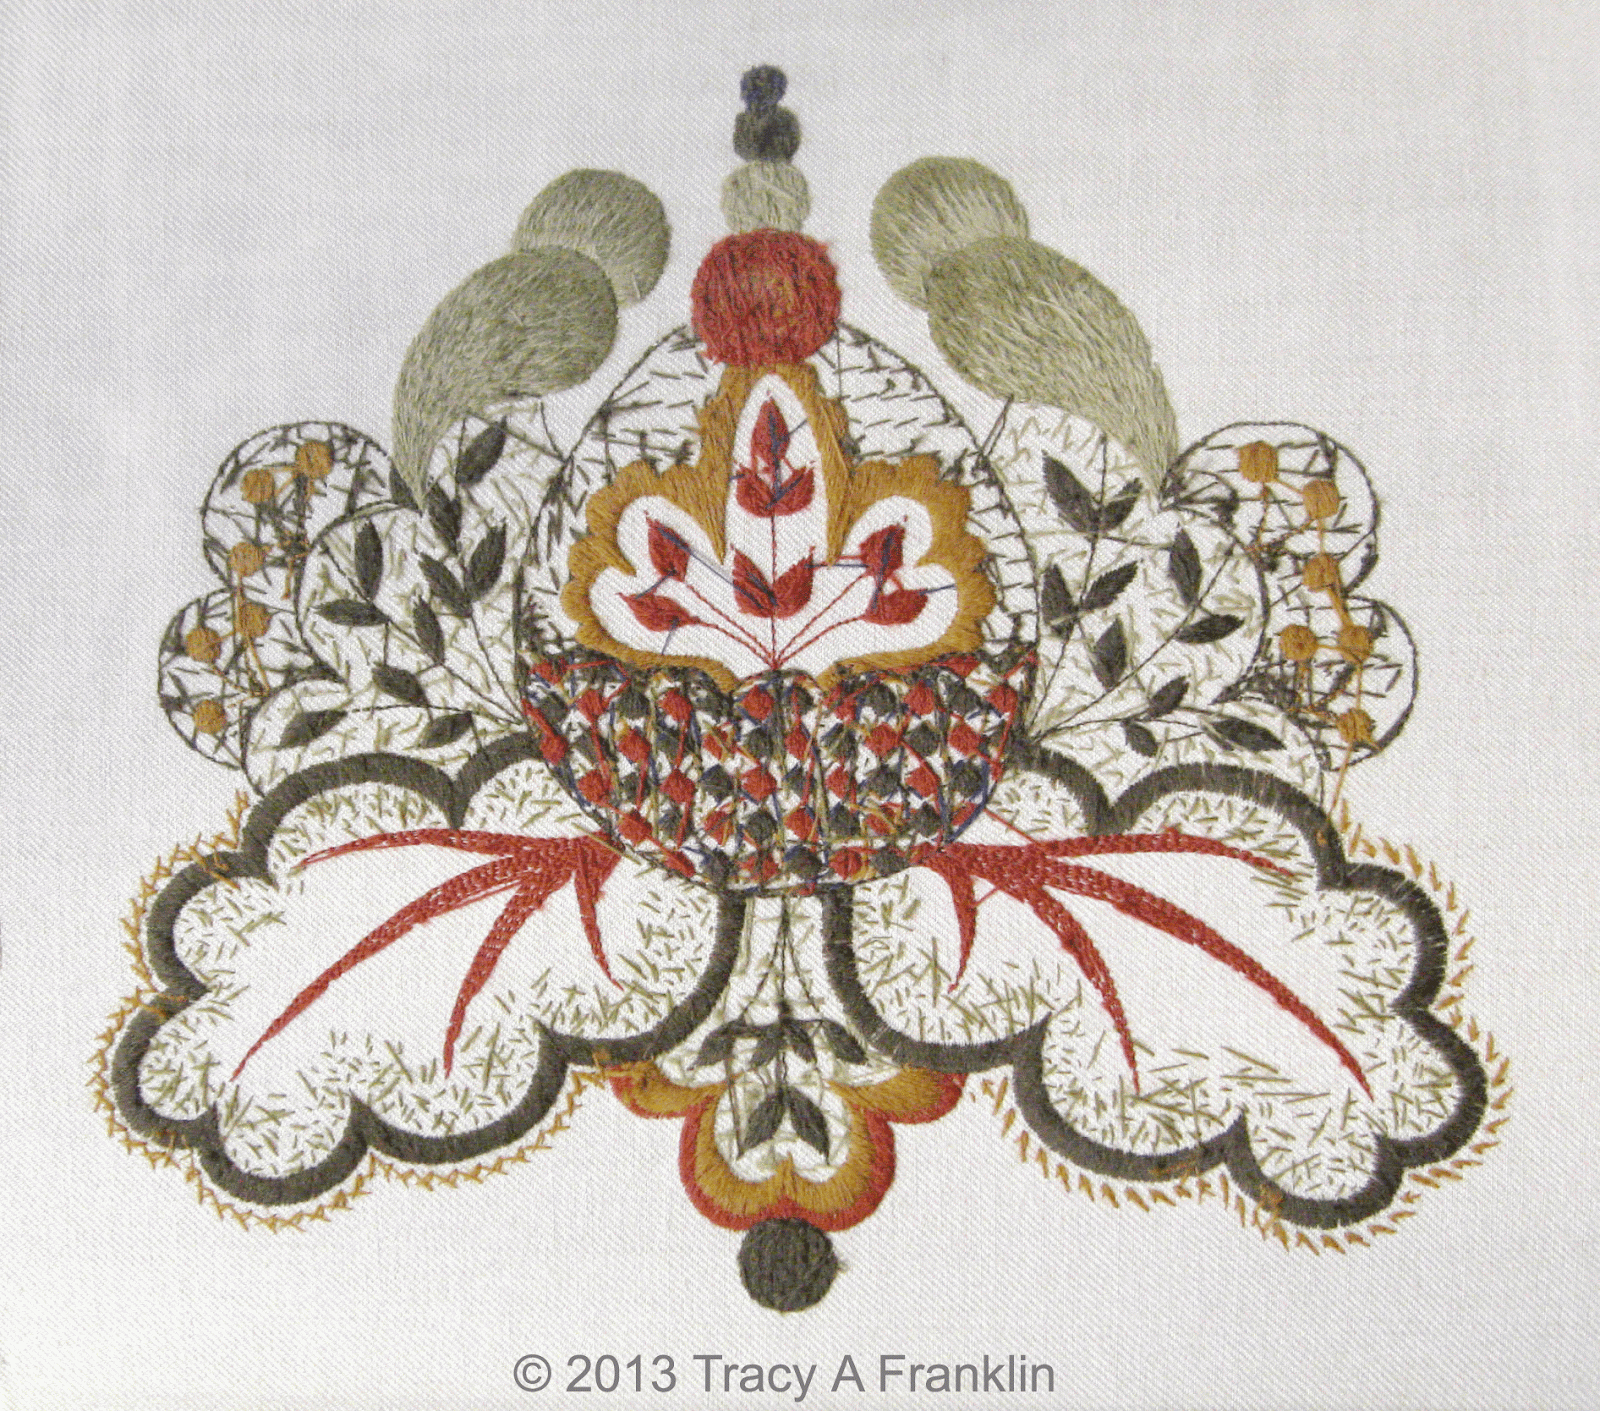
Now back after house moving for three months, and working on a small commission, working my logo for a customer - my silk and gold cross.
So you will see all the details I work through to complete my logo starting with applying the felt padding, followed by the long and short shading, also known as silk shading.
The design is worked on a fine linen fabric, worked with Stranded cotton threads, with the design size being roughly 5cm square or 2 inches.
The photographs are very magnified, and show the work in bigger detail making the technique look coarser than it actually is.
More to come . . .