Showing posts with label Long and short shading. Show all posts

Wednesday, 5 August 2020

A Basic Silk Shading Tutorial . . . .

Split stitch

First stitch, up and over split stitch at the very top tip

Long and short at tip, which is swivelled at the base

Long and short edge, or rather longer and shorter

First row of long and short (longer and shorter). When taking the needle down over the split stitch, keep the stitches very close and tight together.  This keeps a sharp clean edge.

First row, over split stitch with the angle of stitch moving around the leaf shape.  Whilst working the first row, be mindful of maintaining the angle of stitch.

Shading - bringing the needle up within the first row, and shading towards the middle

Bring the needle up in various positions within the first row for a softer shaded effect

Needle or stitch position of second row, or shading

Shading towards the centre of the leaf

Shading with more colour - keep the blends compatible

Showing various needle position for shading

More shading and needle positioning

More needle positioning of shading, illustrating the various positions the stitches can be placed for effective shading

Third row, or further shading

First half of leaf shaded

Second half of leaf, long and short first row

Shading from first row

More shading

Almost complete

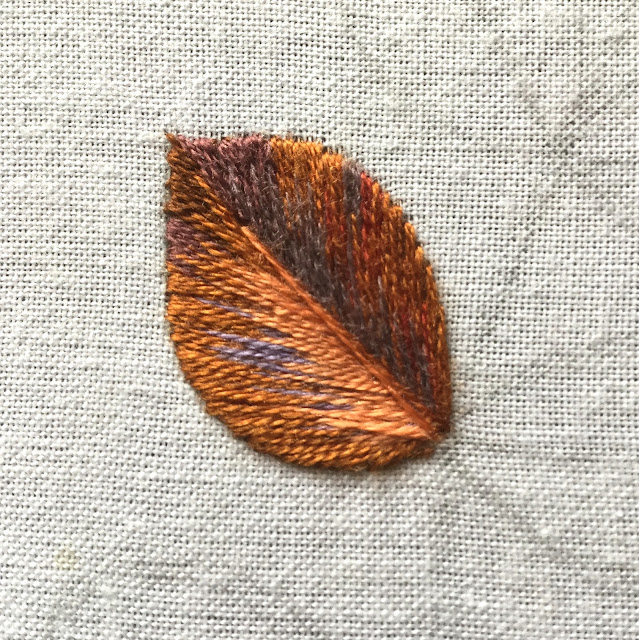
Centre vein.  The whole leaf is roughly an inch square.

Monday, 9 January 2017

Further shading


Working one colour into another is not as simple as stopping one colour, and then starting the next.  When I shade through colours, I would possibly have four different colours/needles working together at the same time, but I would lessen the first colour, increase the second and third, and introduce a forth, before finishing the first, and then repeat . . . 

If one colour is worked, then stopped, then the next and stopped, and so on, the shading will be striped throughout, rather than softly and gradually shaded throughout.

Blending tones of colour, the angle and length of stitch need to be considered also, especially when working around a curve.

Sunday, 4 May 2014

Left or right . . .


Left or right?  I decided to work the design on the right, although if it was worked on a garment, both left and right would be worked.

Ink jet printed onto fabric - the design has so far been worked with
DMC Diamant thread, and stranded cotton, worked onto a cotton furnishing fabric.

Stitches used include long and short shading, and fishbone - so far!

Detail of fishbone, leading into satin stitch


Saturday, 2 November 2013

My Logo . . .

Stage 1 - felt applied and long and short stitch started
Stage 2 - Shading into the long and short stitch

Stage 3 - Detailed shot of shading
Now back after house moving for three months, and working on a small commission, working my logo for a customer - my silk and gold cross.

So you will see all the details I work through to complete my logo starting with applying the felt padding, followed by the long and short shading, also known as silk shading.

The design is worked on a fine linen fabric, worked with Stranded cotton threads, with the design size being roughly 5cm square or 2 inches.  

The photographs are very magnified, and show the work in bigger detail making the technique look coarser than it actually is.

More to come . . .


Sunday, 27 January 2013

long and short in crewel wool . . .

shading using one strand of crewel wool and stem stitch for the leaves
long and short shading detail
Working one colour into another by shading can be quite tricky as the shading can look 'banded'.  To over come this, which takes a little experience, the second colour is introduced gradually, and 'feathered' in, whilst the first colour gradually disappears as shading continues.  On top of this, there is direction to cope with, as the shape expands outwards then curves back in.  However, it is such a pleasure to be stitching on lovely Scottish woven linen twill.

Kathy 'The Unbroken Thread' Andrews - is working the same design for Nicola Jarvis for her forthcoming exhibition which will be later in the year at the William Morris Gallery.  Dates will be issued in future posts.

Sunday, 20 January 2013

next stage . . .

long and short, seeding and fishbone stitch

Slowly coming together - showing V-seeding, ordinary seeding, fishbone stitch for the small leaves, and more long and short shading . . .

Sunday, 30 December 2012

New crewel work project . . .

Designed by Nicola Jarvis
Long and short shading with crewel wool
A new project - I have been commissioned by Nicola Jarvis to work her crewel work design.  More details later . . .